
In order to accept credit card payments using Stripe, you will first need to create a Stripe account. You can find instructions on how to do this on the Stripe website. Once you have an account, it is recommended that you set up two-factor authentication as an added layer of security. I personally use the “Google Authenticator” app for this purpose. After setting it up, you will be able to enter a 6-digit number from the app when prompted by Stripe to access your account.
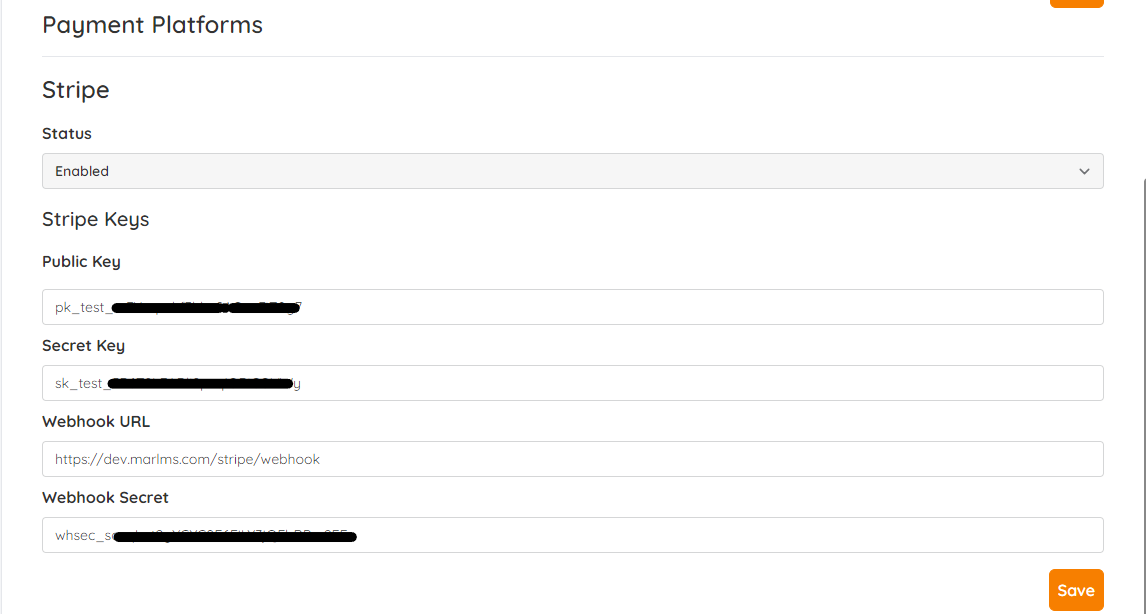
To set up Stripe for your store, you will need to open the marLMS settings and navigate to the store settings. From there, you can enter the required values. These values can be found in the Stripe Dashboard under “Home” on the right-hand side. You will need to enter both the “Publishable key” and the “Secret key”. Please note that the “Secret key” requires the use of the Authenticator App for added security.
It is important to remove the word “test” from the beginning of the number and replace it with “live” for the payment process to work properly.
To enter the Webhook secret, go to the Stripe Dashboard, search for “Webhook” and select “Developer – Webhooks”. From there, you can add an endpoint and then insert the key into marLMS to activate Stripe.